

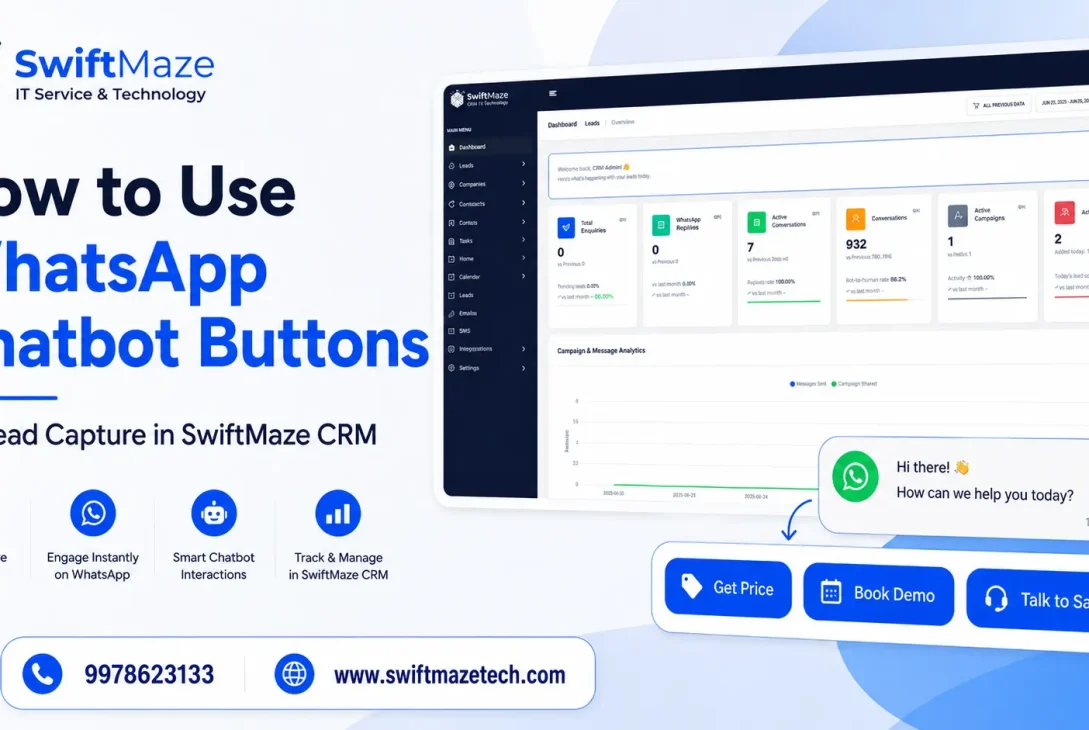
WhatsApp chatbot buttons help your business capture leads faster from WhatsApp. Instead of asking customers to type long messages, you can show simple options like:
- Website Development
- Digital Marketing
- IT Training
- AI Agent
- App Development
- Software Development
When the customer selects an option, SwiftMaze WhatsApp CRM can send the right reply, collect the customer requirement, and move the chat to your team if needed. This saves time and helps your team handle more WhatsApp leads from one dashboard. In this guide, we will learn how to create and manage WhatsApp chatbot buttons in SwiftMaze CRM step by step.
Quick Answer
WhatsApp chatbot buttons are clickable options inside a WhatsApp chat. In SwiftMaze CRM, you can create chatbot flows, add rules, set interactive replies, show service options, collect customer needs, and hand over the chat to your inbox when human support is needed.
What Are WhatsApp Chatbot Buttons?
WhatsApp chatbot buttons are simple clickable options shown inside a WhatsApp message.
For example:
Hello,
Welcome to SwiftMaze Tech Private Limited.
Thank you for contacting us. We help businesses with digital solutions and growth services.
Please select the service you are interested in from the options below.
Button:
Choose Service
After clicking the button, the customer can see service options like:
- Website Development
- Digital Marketing
- IT Training
- AI Agent
- App Development
- Software Development
This makes the chat simple for the customer. They do not need to type a long message. They can select the right option and your team can understand their need faster. In SwiftMaze CRM, businesses can use both quick reply buttons and template buttons. Quick reply buttons are useful for live chatbot replies. They help customers choose an option during the chat. Template buttons are useful inside approved WhatsApp template messages. They are helpful for campaigns, follow-ups, reminders, and business updates.
Why Use WhatsApp Chatbot Buttons for Lead Capture?
Many businesses get WhatsApp messages every day.
Customers ask about price, demo, service details, support, booking, or consultation.
If your team replies late, the lead may go cold.
Chatbot buttons help you reply instantly.
They help you:
- Welcome new customers
- Ask what service they need
- Show clear options
- Collect lead details
- Send the right reply
- Move the chat to the inbox
- Save sales team time
- Reduce repeated manual replies
- Track chatbot activity from logs
Who Can Use This Feature?
WhatsApp chatbot buttons are useful for:
- IT companies
- Digital marketing agencies
- Training institutes
- Real estate businesses
- Clinics
- Coaching classes
- Ecommerce stores
- Local service businesses
- SaaS companies
- Customer support teams
- Sales teams
If your business gets repeated WhatsApp questions, this feature can help.
How to Open SwiftMaze WhatsApp CRM
Step 1: Visit the SwiftMaze WhatsApp CRM Page
First, open the SwiftMaze WhatsApp CRM product page:
https://www.swiftmazetech.com/products/whatsapp-crm/
On this page, you can learn about SwiftMaze WhatsApp CRM features like inbox, chatbot, campaigns, templates, leads, reports, and automation.
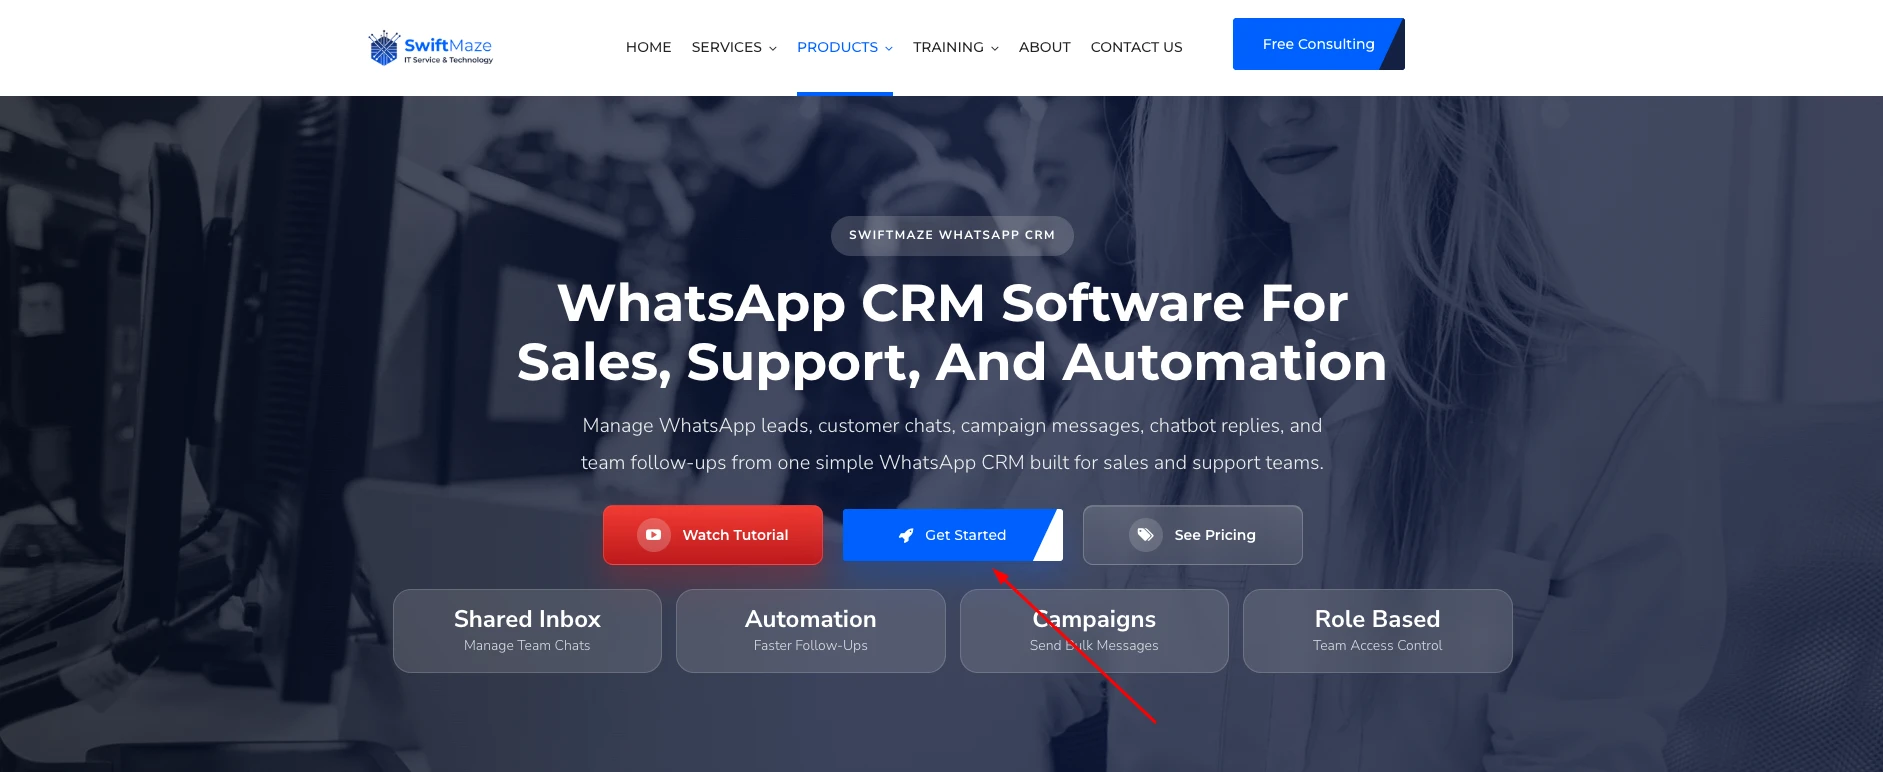
Step 2: Click on Get Started
Click on the Get Started button.
This will take you to the CRM app.
Step 3: Register or Login
If you are a new user, fill out the registration form.
If you already have an account, login with your email and password.
After login, your SwiftMaze CRM dashboard will open.
Step 4: Open the Dashboard
After login, you will see the main dashboard.
On the left side, you will see the navigation menu.
For this guide, click on Chatbot.
Read Also: How to Build a Lead Management System Using WhatsApp + CRM
Understanding the Chatbot Menu in SwiftMaze CRM
Inside the Chatbot menu, you will see four main options:
- Flows
- Rules
- Settings
- Execution Logs
Let us understand each one in simple words.
1. Flows
Flows are the main chatbot groups.
A flow can have many rules inside it.
For example:
Flow Name: SwiftMaze Main Service
Description: New customer service selection and lead intake
This means the flow is used to welcome new customers, show services, and collect their interest.
2. Rules
Rules decide what the chatbot should send when a customer sends a message.
For example:
When a customer sends “hi”, the chatbot can show the welcome menu.
For a message like “pricing”, the chatbot can send a pricing reply.
After the customer selects “Digital Marketing”, the chatbot can send a digital marketing reply.
3. Settings
Settings control the main chatbot behavior.
Here you can enable or disable:
- Chatbot
- Handoff
- Business hours
You can also set timezone and working hours.
4. Execution Logs
Execution Logs show what happened when a customer message came in.
You can check:
- Time
- Integration
- Phone number
- Action
- Result
- Rule used
This helps you see if the chatbot is working properly.
Step-by-Step Guide to Create WhatsApp Chatbot Buttons in SwiftMaze CRM
How to Create a Chatbot Flows
Step 1: Open Flows
After clicked on chatbot you will see flows so click on Flows. Here you can see your chatbot flows.
You may see an existing flow according you generated before.
You can also see details like:
- Integration
- Status
- Rules
- Published
- Updated
- Actions
If the flow is live, the status will show Published.
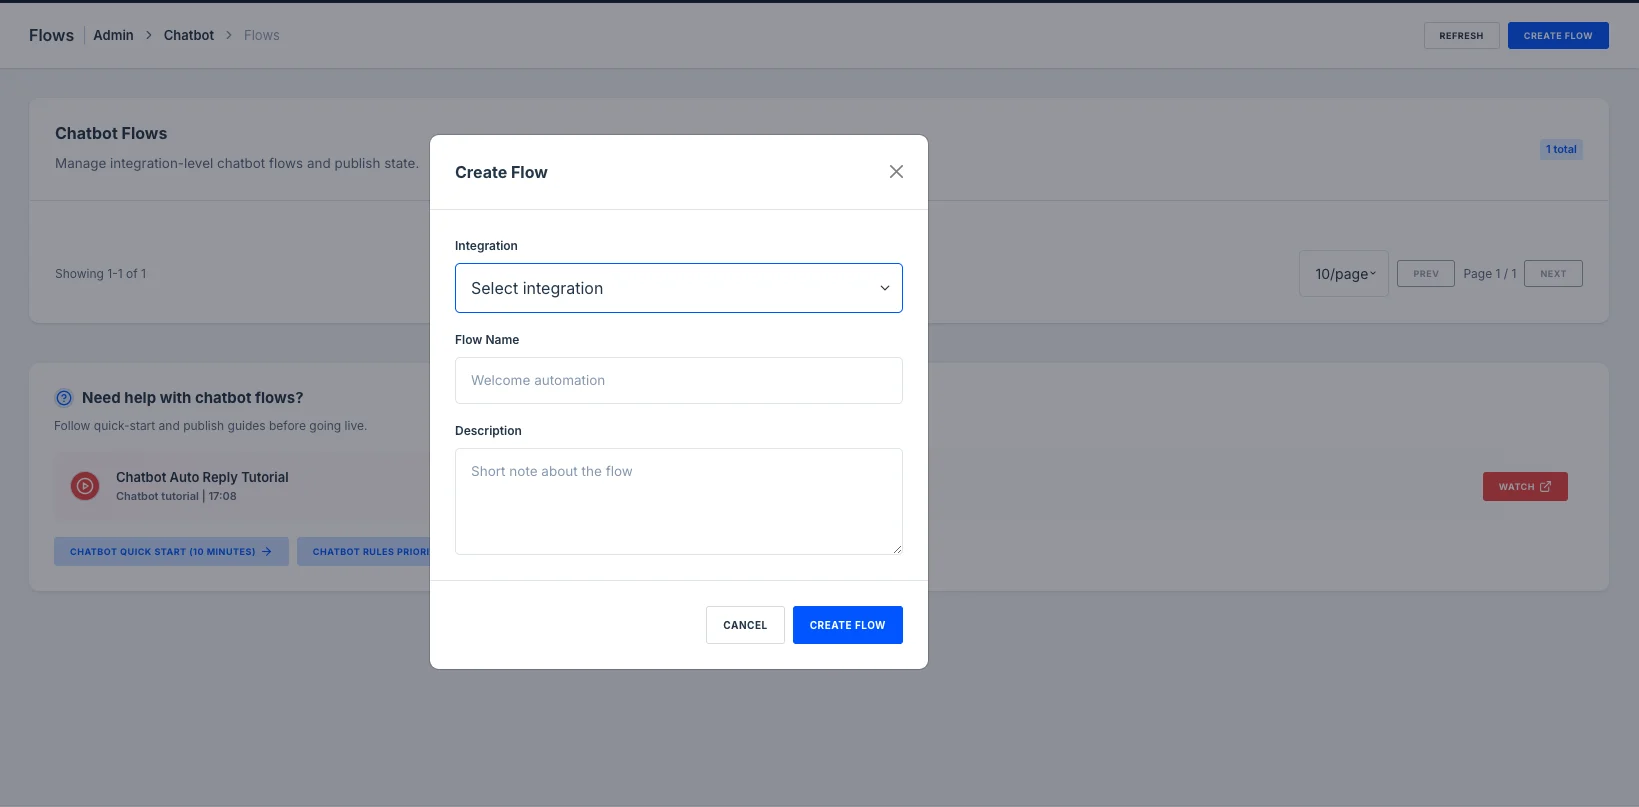
Step 2: Create a New Flow
Click on Create Flow.
A popup will open.
You will see fields like:
- Integration
- Flow Name
- Description
Step 3: Select Integration
In the Integration field, select your WhatsApp integration.
Example:
WhatsApp – SwiftMaze Tech Private Limited
This tells the system which WhatsApp account should use this chatbot flow.
Step 4: Add Flow Name
Add a simple flow name.
Example:
New Lead Capture Flow
Other examples:
- Welcome Automation
- Service Enquiry Flow
- Pricing Enquiry Flow
- Demo Booking Flow
- Support Flow
- Main Service Intake Flow
Use a clear name so your team can understand the flow later.
Step 5: Add Description
Add a short description.
Example: This flow welcomes new customers, shows service options, and captures lead interest.
Step 6: Click Create Flow
After adding details, click on Create Flow. Now your chatbot flow is created.
Next, you need to create rules inside this flow.
Important note about lead saving
When a customer selects a chatbot option, the chat appears in the Inbox. From the Inbox, your team can click the Save Lead option and save that customer as a lead.
This helps your team keep important WhatsApp enquiries in the Leads section for follow-up.
How to Create a Chatbot Rule
Step 1: Go to Rules
Inside Chatbot, click on Rules.
Then click on create rule or add rule.
The Create Chatbot Rule page will open.
Step 2: Add Rule Name
In the Rule Name field, add a clear name.
Example:
Welcome Main Menu
Other examples:
- Pricing Reply
- Demo Booking Reply
- Support Handoff
- Website Development Reply
- Digital Marketing Reply
- Invalid Input Fallback
Step 3: Select Rule Type
You will see rule types like:
- Welcome
- Keyword
- Fallback
- Business Hours
- Handoff
Choose the rule type based on your need.
Watch this SwiftMaze WhatsApp CRM chatbot tutorial to see how auto replies, rules, flows, and keyword automation work inside the dashboard.
What Each Rule Type Means
Welcome
Use this when you want to send the first message to a new customer.
Example:
Customer sends hi.
Bot sends welcome message with service options.
Keyword
Use this when you want the bot to reply based on customer words.
Example:
Customer sends pricing.
Bot sends pricing related reply.
Fallback
Use this when the bot does not understand the customer message.
Example:
Customer sends something that does not match any rule.
Bot sends:
Sorry, I could not understand that. Please choose one option from the menu.
Business Hours
Use this to control replies based on your working hours.
Example:
If customer messages after office time, bot can say:
Our team is offline right now. We will reply during business hours.
Handoff
Use this when the chatbot should move the chat to a human team member.
Example:
Customer selects Talk to Sales.
The chat can be moved to the inbox for manual reply.
Step 4: Set Priority
Priority decides which rule should run first.
A lower or higher number may be used based on your system rule order.
In your dashboard, examples show priority like 10 or 100.
Use priority carefully.
For example:
Welcome rule can have high priority.
Fallback rule should usually run after other rules.
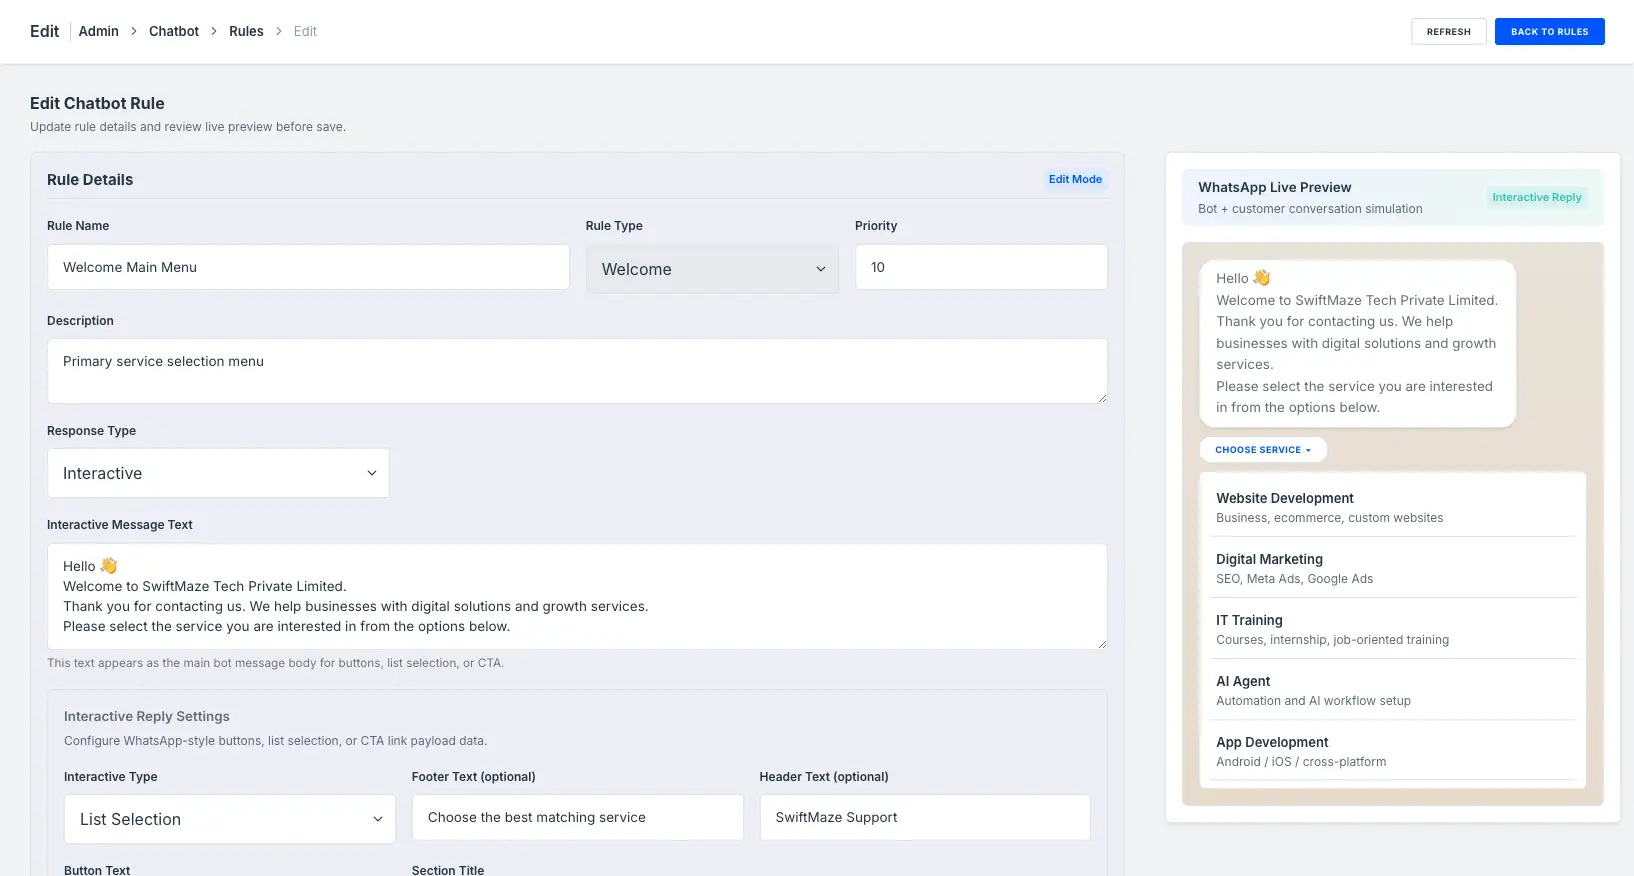
Step 5: Add Description
Add a short note about the rule.
Example:
Primary service selection menu
This helps your team understand the rule later.
How to Add Interactive Chatbot Buttons or List Options
In SwiftMaze CRM, you can create an interactive reply.
This can show a button like Choose Service and then show a list of service options.
Step 1: Select Response Type
In the rule page, find Response Type.
- Select: Interactive
This is used when you want to show clickable options instead of only text.
Step 2: Add Interactive Message Text
Write the main message that the customer will see.
Example:
Hello
Welcome to SwiftMaze Tech Private Limited.
Thank you for contacting us. We help businesses with digital solutions and growth services.
Please select the service you are interested in from the options below.
Keep this message short and clear.
Step 3: Choose Interactive Type
In Interactive Reply Settings, select the interactive type.
- Example: List Selection
This means the customer can click a button and then choose from a list.
Step 4: Add Button Text
Add button text.
- Example: Choose Service
This is the button the customer will tap.
Keep button text short.
Good button text examples:
- Choose Service
- Select Option
- Get Details
- Book Demo
- Talk to Team
- Need Support
Step 5: Add Footer Text
Footer text is optional.
- Example: Choose the best matching service
This appears below the message or near the interactive option.
Step 6: Add Header Text
Header text is optional.
- Example: SwiftMaze Support
This helps make the message look more clear.
Step 7: Add Section Title
Add a section title for your list.
- Example: Main Services
This tells the customer what the list is about.
Step 8: Add List Rows
Now add the list rows.
Each row should have:
- Option name
- Option value or ID
- Short description
Example list rows:
Website Development
- Row 1
- Option name: Website Development
- Value: website_development
- Description: Business, ecommerce, custom websites
Digital Marketing
- Row 2
- Option name: Digital Marketing
- Value: digital_marketing
- Description: SEO, Meta Ads, Google Ads
IT Training
- Row 3
- Option name: IT Training
- Value: it_training
- Description: Courses, internship, job-oriented training
AI Agent
- Row 4
- Option name: AI Agent
- Value: ai_agent
- Description: Automation and AI workflow setup
App Development
- Row 5
- Option name: App Development
- Value: app_development
- Description: Android, iOS, cross-platform
Software Development
- Row 6
- Option name: Software Development
- Value: software_development
- Description: CRM, ERP, custom systems
Step 9: Check the WhatsApp Live Preview
On the right side, you can see WhatsApp Live Preview.
This preview shows how your message will look to the customer.
Check:
- Main message
- Button text
- List options
- Descriptions
- Spelling
- Flow clarity
If the preview looks good, save the rule.
Step 10: Create Draft or Create and Publish
At the bottom, you may see options like:
- Cancel
- Create Draft
- Create and Publish
If you want to test later, click Create Draft.
If you are ready to make it live, click Create and Publish.
How to Use Keywords in Chatbot Rules
Keywords tell the bot when to send a reply. In the rule page, you can add keywords like:
- contains: pricing
- exact: hi
This means:
- If the customer message contains “pricing”, the rule can run.
- If the customer message is exactly “hi”, the rule can run.
Keyword Examples for Lead Capture
Use these keywords:
- hello
- price
- pricing
- demo
- interested
- website
- digital marketing
- app
- crm
- support
- course
- training
- ai agent
- hi
Simple Keyword Tips
Use simple customer words. Do not add only technical words.
Customers may type:
- price
- details
- demo
- call
- service
- support
So your keywords should match real customer language.
Read Also: How to Build a Lead Management System Using WhatsApp + CRM
Important Rule Options
On the rule page, you may see options like:
- One time per conversation
- Stop after match
- Handoff to inbox
Let us understand them.
One Time Per Conversation
Use this if you want the rule to run only once in one customer chat.
- Example: Welcome message should not repeat again and again.
Stop After Match
Use this when you want the system to stop checking other rules after one rule is matched.
This helps avoid sending multiple bot replies for the same message.
Handoff to Inbox
Use this when the chatbot should move the conversation to a human team.
- Example: Customer selects Talk to Sales.
Now your sales team should reply from the inbox.
How to Set Chatbot Settings
Before making your chatbot live, check the Settings section.
Step 1: Open Chatbot Settings
Go to: Chatbot > Settings
Here you will see options like:
- Enable chatbot
- Enable handoff
- Enable business hours
- Timezone
- Business Hours Builder
Step 2: Enable Chatbot
Turn on Enable chatbot.
This allows the chatbot to send automatic replies for this integration.
If this is off, your chatbot rules may not run.
Step 3: Enable Handoff
Turn on Enable handoff.
This helps move the conversation to the inbox when the bot cannot handle it or when customer needs human help.
Step 4: Enable Business Hours
Turn on Enable business hours if you want chatbot availability based on office timing.
This is useful when your team works only during fixed hours.
Step 5: Set Timezone
Choose the correct timezone.
For India, use:
Asia/Kolkata
Step 6: Set Business Hours
Use the Business Hours Builder to set working days and time.
Example:
- Monday: 09:00 am to 06:00 pm
- Tuesday: 09:00 am to 06:00 pm
- Wednesday: 09:00 am to 06:00 pm
- Thursday: 09:00 am to 06:00 pm
- Friday: 09:00 am to 06:00 pm
- Saturday: 10:00 am to 02:00 pm
- Sunday: 10:00 am to 02:00 pm
You can turn days on or off based on your business.
Step 7: Save Settings
After setting everything, click Save Settings.
How to Check Chatbot Execution Logs
Execution Logs help you understand if your chatbot is working properly.
Step 1: Open Execution Logs
Go to:
Chatbot > Execution Logs
Here you can see chatbot activity.
Step 2: Use Search and Filters
You can search by:
- Phone
- Rule
- Flow
- Integration
- Keyword
You can also filter by:
- Result
- Action
- Rows
Step 3: Check the Log Table
The log table can show:
- Time
- Integration
- Phone
- Action
- Result
- Rule
- View action
Example:
Action: Handoff
Result: Success
Rule: Fallback Invalid Input
This means the chatbot moved the conversation to handoff successfully.
Step 4: Use Logs to Improve Chatbot
When many customers go to fallback, your chatbot may need better keywords.
A high number of handoffs can mean your bot needs clearer options.
For a rule that is not running, check:
- Keywords
- Rule type
- Flow status
- Published status
- Chatbot settings
- Business hours
Best WhatsApp Chatbot Button Examples for Lead Capture
Example 1: IT Service Company
Message:
Hello
Welcome to SwiftMaze Tech Private Limited.
Please choose the service you need.
Button:
Choose Service
Options:
- Website Development
- Digital Marketing
- App Development
- Software Development
- AI Agent
- IT Training
Best for:
IT companies, agencies, software companies, service providers.
Example 2: Digital Marketing Lead
Message for digital marketing:
Thanks for your interest in our digital marketing service.
Which service do you need?
Options:
- SEO
- Google Ads
- Meta Ads
- Full Marketing Plan
Next reply:
Please share your business website and city. Our team will check and guide you.
Example 3: Demo Booking Lead
Message:
Do you want to book a demo?
Options:
- Book Today
- Book Tomorrow
- Talk to Team
Next reply:
Please share your name and preferred time. Our team will contact you.
Example 4: Support Flow
Message:
How can we help you?
Options:
- Login Issue
- Campaign Issue
- Template Issue
- Talk to Support
Next reply:
Please share your issue in short. Our support team will check and reply.
Example 5: Training Enquiry
Message:
Which training details do you need?
Options:
- Digital Marketing
- Web Design
- App Development
- AI Automation
Next reply:
Please share your name, city, and preferred course. Our team will guide you.
Best Practices for WhatsApp Chatbot Buttons
1. Keep the First Message Short
Do not write a very long message.
Customers should quickly understand what to do.
2. Use Simple Button Text
Good examples:
- Choose Service
- Book Demo
- Get Price
- Talk to Team
- Need Support
Avoid long text.
3. Add Only Useful Options
Do not add too many options.
Start with your main services.
4. Use Human Handoff
Always give customers a way to reach your team.
Bots are helpful, but some customers need human support.
5. Test the Preview
Always check WhatsApp Live Preview before publishing.
6. Check Logs After Publishing
After going live, check Execution Logs.
This helps you find problems and improve the chatbot.
7. Keep Keywords Natural
Use words that real customers type.
Example:
- price
- demo
- help
- support
- details
- service
- call
8. Update Your Flow Regularly
Your services, offers, and team process may change.
So review your chatbot every few weeks.
Common Mistakes to Avoid
Mistake 1: Creating Flow but Not Publishing It
If the flow is not published, it may not work for customers.
Always check flow status.
Mistake 2: Chatbot Setting Is Off
If Enable Chatbot is off, rules may not run.
Check Settings before testing.
Mistake 3: Wrong Keywords
If your keywords do not match customer messages, the chatbot will not reply properly.
Use simple keywords.
Mistake 4: No Fallback Rule
Always create a fallback rule.
If the bot does not understand the message, fallback helps guide the customer.
Mistake 5: No Handoff Option
If the bot cannot solve the issue, the customer should reach your team.
Enable handoff and use handoff to inbox where needed.
Mistake 6: No Business Hours Setup
If your team is offline, customers should know when they will get a reply.
Use business hours for better customer experience.
Mistake 7: Not Checking Execution Logs
Logs show what is working and what is not.
Check logs after publishing.
Want to see the full SwiftMaze WhatsApp CRM system? Watch the complete demo here.
Final Words
WhatsApp chatbot buttons make lead capture simple. Chatbot buttons help customers choose the right service. Your team can understand the customer need faster. This also reduces repeated manual replies. With SwiftMaze WhatsApp CRM, you can create flows, add rules, set interactive replies, enable handoff, set business hours, and check execution logs from one dashboard.
- Start with a simple welcome flow.
- Show your main services.
- Add clear button options.
- Enable handoff.
- Test the chatbot.
- Check logs.
- Then improve the flow based on real customer replies.
- This simple setup can help your business reply faster, capture more leads, and manage WhatsApp enquiries in a better way.
FAQs
1. What are WhatsApp chatbot buttons?
WhatsApp chatbot buttons are clickable options inside a WhatsApp message. They help customers choose what they need without typing a long reply.
2. Can I create chatbot buttons in SwiftMaze CRM?
Yes. In SwiftMaze CRM, you can create chatbot flows and rules with interactive replies like list selection and service options.
3. What is a chatbot flow in SwiftMaze CRM?
A chatbot flow is a group of chatbot rules. It controls how the bot replies to customer messages for one WhatsApp integration.
4. What is a chatbot rule?
A chatbot rule tells the bot what to do when a customer sends a message or selects an option.
5. What is the use of keywords in chatbot rules?
Keywords help the bot understand when to send a reply. For example, if the customer sends “pricing”, the bot can send a pricing reply.
6. What is handoff in SwiftMaze CRM?
Handoff moves the chat from bot to human team. This is useful when the bot cannot answer or when the customer wants to talk to your team.
7. Why should I use business hours in chatbot settings?
Business hours help you control when the chatbot and team support should be active. It also helps customers know when they can expect a reply.
8. How can I check if my chatbot is working?
You can check Execution Logs. Logs show the customer phone number, action, result, and matched rule.
9. Should I use fallback rules?
Yes. A fallback rule helps when the bot does not understand the customer message. It can guide the customer back to the main menu or move the chat to your team.
10. What is the best first chatbot menu for lead capture?
A good first menu can show your main services. For example: Website Development, Digital Marketing, IT Training, AI Agent, App Development, and Software Development.
whatsapp auto reply whatsapp business chatbot buttons whatsapp button reply whatsapp chatbot example whatsapp chatbot for business whatsapp crm chatbot whatsapp lead capture
Last modified: June 13, 2026

[…] Read Also: How to Use WhatsApp Chatbot Buttons for Lead Capture in SwiftMaze CRM […]